The Ultimate Dash Cam Installation Guide for Any Vehicle
Why Install a Dash Cam?
Installing a dash cam enhances your vehicle’s security, provides video evidence in case of accidents, and helps monitor driving behavior. Whether you’re looking for a simple plug-and-play setup or a hardwired installation for advanced features like parking mode, this guide will walk you through both methods.
What You Need Before Installing a Dash Cam
Before starting the installation process, make sure you have:
- A compatible SD card (check manufacturer recommendations)
- The dash cam unit with all accessories
- A power cable or hardwire kit
- A fuse tap and circuit tester (for hardwired installation)
- Adhesive clips or a trim tool for cable management
Method 1: Basic Dash Cam Installation (Plug-and-Play)
This method is the easiest and ideal for beginners.
Step 1: Choose the Best Mounting Location
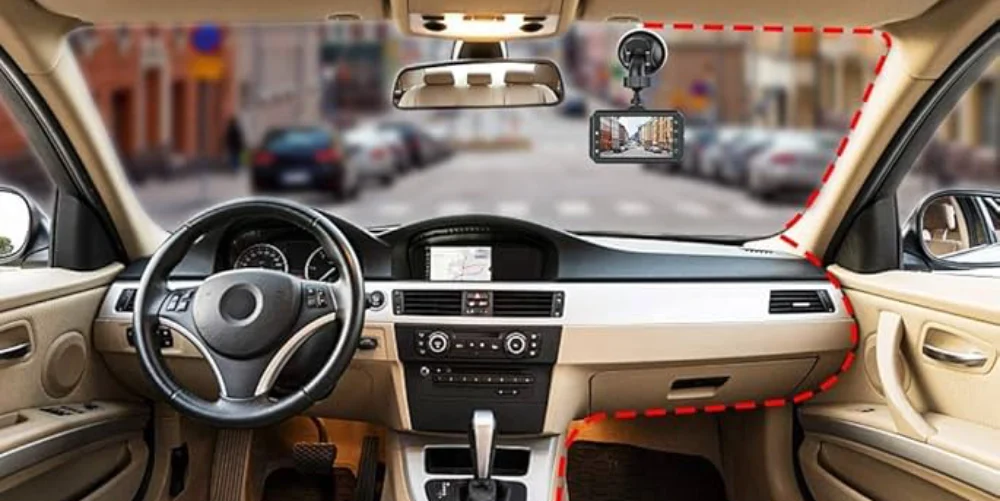
- Position the dash cam near the center of your windshield, preferably behind the rearview mirror.
- Ensure it has an unobstructed view of the road for clear footage.
Step 2: Attach the Power Cable
- Plug the power cable into the dash cam.
- Run the cable along the windshield edge and tuck it into the car’s trim for a neat setup.
- Insert the other end into the car’s cigarette lighter or USB power port.
Step 3: Power On and Test
- Start your car to ensure the dash cam turns on automatically.
- Use the mobile app (if available) to adjust settings and check the camera angle.
Step 4: Adjust the Camera for the Best View
- Make sure the dash cam captures the road ahead without obstruction.
- Test the footage for clarity, avoiding reflections or glares.
Method 2: Hardwired Dash Cam Installation (For Advanced Features)
Hardwiring a dash cam enables 24/7 parking monitoring, automatic power management, and a cleaner setup without visible cables.
Step 1: Route the Power Cable to the Fuse Box
- Use a trim removal tool to neatly tuck the cable along the car’s headliner and down to the fuse box.
- This ensures a discreet and professional look.
Step 2: Locate the Vehicle’s Fuse Box
- Check your car’s manual to find the fuse box location (usually under the dashboard or in the engine compartment).
Step 3: Identify ACC and Constant Power Fuses
- Use a circuit tester to find:
- An ACC fuse (only powered when the car is on).
- A constant power fuse (always powered, even when the car is off).
Step 4: Connect the Hardwire Kit
- Remove the identified fuses and insert them into the fuse taps of the hardwire kit.
- Connect the red wire to the ACC fuse and yellow wire to the constant power fuse.
- Securely insert the fuse taps back into their respective slots.
Step 5: Ground the Connection
- Attach the black ground wire to a metal part of the car’s frame (e.g., a bolt or screw).
- This ensures a stable and safe electrical connection.
Step 6: Power On and Test
- Turn on the ignition and check if the dash cam functions properly.
- Use the mobile app to configure settings and enable features like parking mode.
Dash Cam Installation Tips for Best Performance
- Use a high-quality SD card to prevent recording errors.
- Avoid placing the dash cam in the driver’s line of sight to comply with local laws.
- Regularly check footage to ensure the camera is capturing clear and stable video.
- Secure loose cables to prevent distractions while driving.
Final Thoughts: Install Your Dash Cam Like a Pro
Installing a dash cam is a smart investment for vehicle safety and security. Whether you opt for a plug-and-play setup or a hardwired installation, following this guide ensures a smooth process. If you're unsure about the wiring, consult a professional to avoid potential electrical issues.
Frequently Asked Questions (FAQs)
Q: Can I install a dash cam myself?
A: Yes! A plug-and-play dash cam is easy to install, while a hardwired setup requires basic knowledge of vehicle electronics.
Q: Will a dash cam drain my car battery?
A: No, if installed correctly. Hardwired dash cams have built-in power management to prevent battery drain.
Q: Where should I mount my dash cam for the best view?
A: The best position is behind the rearview mirror, centered on the windshield for a wide and balanced view.
By following this step-by-step guide, you can set up your dash cam effortlessly and enjoy enhanced security and peace of mind on the road.
Discover the best dash cams in our store.


