Installing a motorcycle dashcam, like the INNOVV K5, on your 2018 Harley-Davidson Street Glide CVO is a great way to enhance safety and document your rides. This guide provides detailed, step-by-step instructions to ensure a seamless installation process. By following this guide, you'll be able to set up your INNOVV K5 motorcycle dashcam with ease.
Why Install the INNOVV K5 on a Harley-Davidson?
Motorcycle dash cams are essential for capturing rides, providing evidence in case of accidents, and enhancing security. The INNOVV K5 is one of the best options for motorcyclists, offering features like:
- 4K Ultra HD front camera and 1080p rear camera
- Wi-Fi connectivity for easy video access
- Automatic loop recording
- GPS tracking
- Waterproof and durable build for all weather conditions
Tools and Materials Needed
Before starting the installation, gather the necessary tools:
- INNOVV K5 dashcam kit
- Screwdrivers (Phillips and flathead)
- Hex keys
- Double-sided tape or zip ties
- Electrical tape
- Wire cutters and strippers
- Fuse taps (for connecting to the bike’s power source)
Step-by-Step Installation Guide
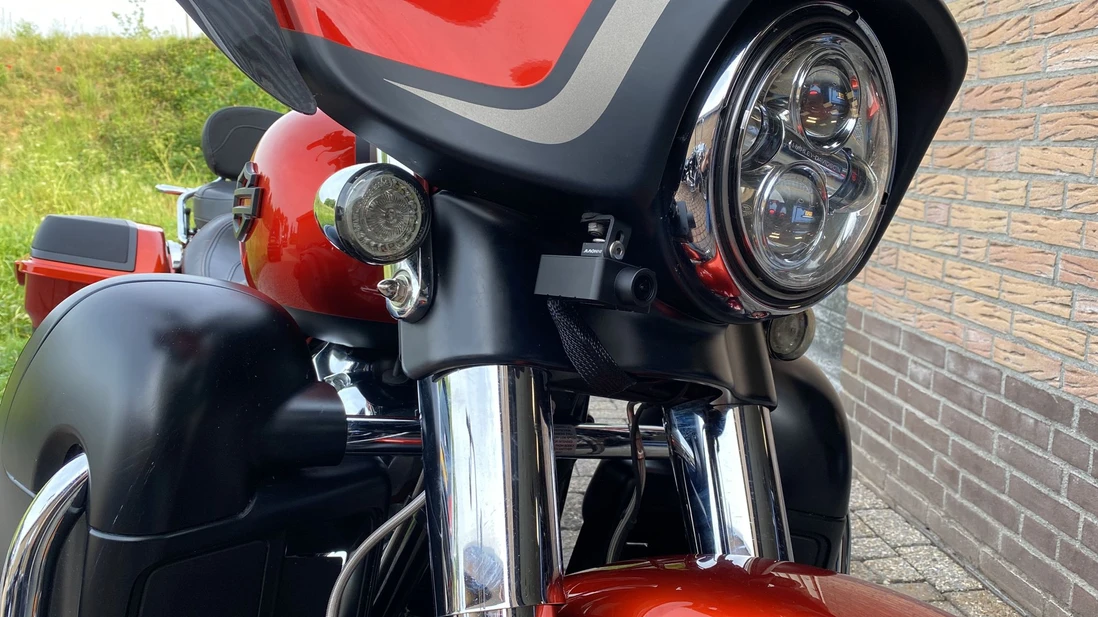
Step 1: Choose Mounting Locations for Cameras
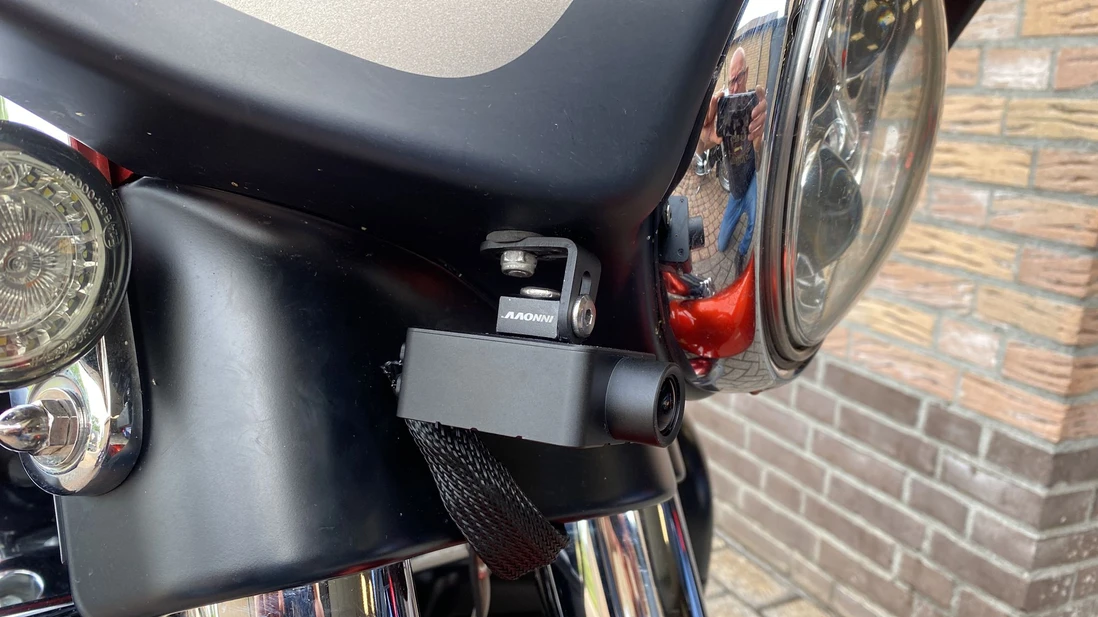
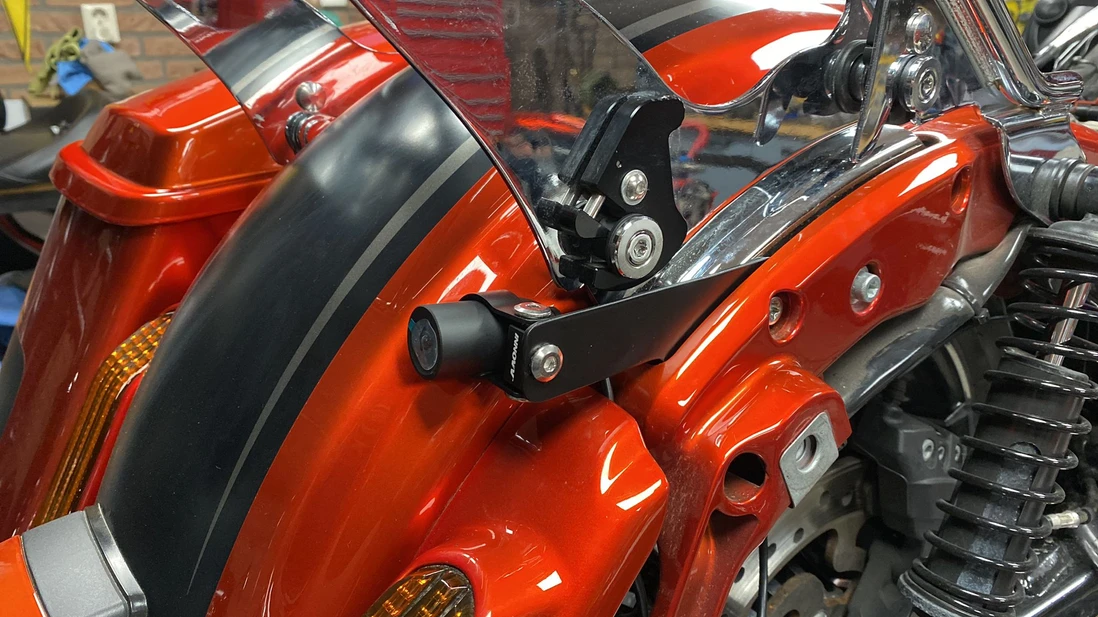
- Front Camera: Ideally, mount the front camera under the fairing, near the headlight, or on the handlebar to get a clear road view.
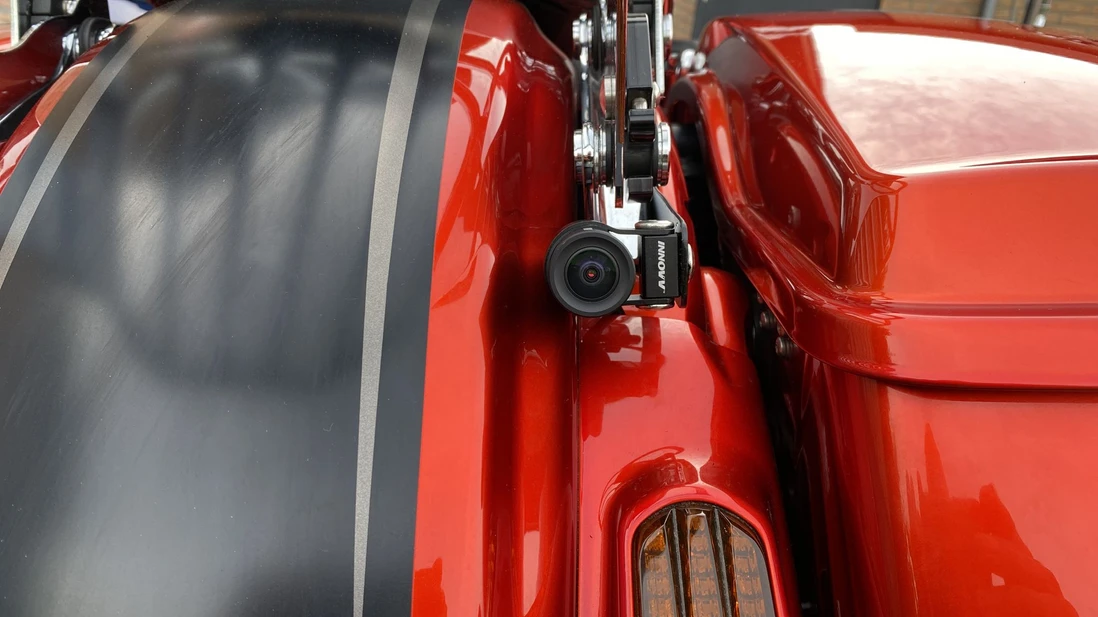
- Rear Camera: Mount the rear camera on the rear fender or saddlebag to capture traffic behind you.
Secure the cameras using adhesive mounts or brackets, ensuring they are aligned properly for the best recording angles.
Step 2: Install the Main DVR Unit
- Locate a safe and dry area, such as under the seat or inside a saddlebag, to install the DVR unit.
- Attach the DVR unit securely using double-sided tape or brackets.
- Ensure that there’s enough ventilation to prevent overheating.
Step 3: Route the Wiring
Properly routing the wires is crucial for a clean installation. Follow these tips:
- Run front and rear camera cables along the bike’s frame, avoiding moving parts or hot engine components.
- Use zip ties to keep the cables secure and prevent them from dangling.
- Keep wiring away from high-heat areas to avoid damage.
Step 4: Connect to Power
The INNOVV K5 system requires a power source. Follow these steps:
- Locate the fuse box on your Harley-Davidson Street Glide CVO.
- Use fuse taps to connect the power cable to an accessory fuse that turns on with the ignition.
- Connect the ground wire to a metal part of the frame.
- Double-check connections and ensure they are secure.
Step 5: Test the System
- Turn on your Harley-Davidson and check if the INNOVV K5 powers up automatically.
- Open the INNOVV app on your smartphone and check the camera feeds.
- Ensure the GPS signal is active and the recording starts as expected.
- Adjust camera angles if necessary.
Step 6: Secure and Finalize Installation
- Once everything is working correctly, use electrical tape and zip ties to secure loose wires.
- Ensure all components are waterproofed and shielded from extreme heat.
- Take a short test ride to verify that the setup remains stable.
Maintenance and Troubleshooting Tips
Regular Maintenance
- Clean the lenses regularly to maintain video clarity.
- Check wiring and mounts periodically to ensure nothing is loose.
- Keep the firmware updated via the INNOVV app.
Troubleshooting Common Issues
- Camera not turning on? Check power connections and fuse.
- Poor video quality? Clean the lenses and check for misalignment.
- App not connecting? Ensure Wi-Fi is enabled and try reconnecting.
- GPS not working? Make sure the GPS antenna has a clear sky view.
Frequently Asked Questions (FAQs)
1. How long does it take to install the INNOVV K5 on a Harley-Davidson Street Glide CVO?
Installation typically takes 1.5 to 3 hours, depending on experience and tools available.
2. Does installing a dashcam void my Harley-Davidson warranty?
No, installing a dashcam does not void the warranty as long as no permanent modifications are made to the electrical system.
3. Can I install the INNOVV K5 without professional help?
Yes, if you are comfortable with basic wiring and mounting, you can DIY the installation using this guide.
4. Will the dashcam drain my bike’s battery?
No, the INNOVV K5 is wired to the ignition fuse, meaning it only draws power when the bike is running.
5. Is the INNOVV K5 waterproof?
Yes, the INNOVV K5 and its components are waterproof and designed for all weather conditions.
6. How do I access and download footage?
You can use the INNOVV mobile app to access, download, and manage videos wirelessly via Wi-Fi.
7. Where is the best place to mount the DVR unit?
The best location is under the seat or inside a saddlebag, where it is protected from direct exposure to the elements.
By following this guide, you can successfully install the INNOVV K5 dashcam on your 2018 Harley-Davidson Street Glide CVO, ensuring high-quality video recording for your rides. If you have any questions or need further assistance, feel free to leave a comment or check out our detailed installation video.